Pages

Pages

Tuesday, 15 December 2015

Introducing CTMH Charlotte

My Charlotte Samples have arrived today!

Available January 1st, 2016, the Seasonal Expressions 1 -  Idea Book is packed full of very exciting new products. We are now able to preview images from the idea book and, today I am sharing the beautiful Charlotte Papers and Accessories and letting you in on some of the changes.

Charlotte WYW Kit (Workshop Your Way) are replacing the WOTG Kits (Workshop On The Go)

There will no longer be a Stamp Set included in the kit (which appeals to the card maker in me.  As lovely as the stamp sets were, more often than not they were too large for cards very disappointing).

Use the materials and online guide to create three traditional layouts
and one Picture My Life™ layout.
1 – Charlotte Paper Packet (X7205B) -  Twelve 12"x12" B&T Duos (6 doubled sided designs)
1 – Charlotte Complements (X7205C)
3 – Cardstock Sheets (1 Black, 2 Whisper)
1 – Black & Gold Ribbon (Z3197) NEW
1 – Treasured Puffies (Z3203)
$41 AUD
Charlotte Love Layout
features Complements & Black & Gold Ribbon & PML


There is enough paper in the kit to complete three (3) Double page layouts PLUS a Picture My Life (PML) Layout.  The PML B&T mimics the CTMH PML cards with every image being Portrait and  the reverse side Landscape  (a grand total of  6 - 4" x  6" pieces and 12 - 3"x4" pieces to cut.  

Charlotte Home Is Layout

The PML (Picture My Life) sheets are perfect for journaling - quick, simple and beautifully co-ordinated to the entire layout.  No more searching for the "right" embellishment.
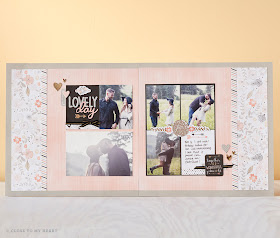
Charlotte Lovely Day Layout
The Zip Strips for each page are gorgeous too!


NEW Charlotte Picture My Life (PML) Layout
using the NEW PML B&T paper
Would you believe there is still sufficient paper in the kit to make the gorgeous cards pictured 
Make 9 cards, 3 of each design, u sing your remaining workshop materials and just a few extra supplies. PLEASE NOTE Card Bases, Envelopes and Stamp Set not included in the WYW Kit. 


Charlotte Card Making Workshop

THE MOST EXCITING NEWS....as far as I am concerned.... 

CTMH has introduced THIN CUTS.  The most gorgeous and delicate dies to co-ordinate with selected stamp sets. They come packaged with a metallic holding plate inside the sturdy plastic folder (same as our stamp sets).  I had planned to to stamp and die-cut the Springtime Wishes - Stamp Set with the Spring Time Wishes Thin Cuts.  However, and would you believe I somehow managed to delete the Stamp Set from my order.  Have ordered the set today, so stay tuned. I did however try out the dies THEY ARE GORGEOUS!!! and I am so excited.

My Acrylix® Springtime Wishes Stamp Set - $21.00

I promise I will be posting examples as soon as my missing Springtime Wishes Stamp Set arrives.
Until then,Happy Crafting!
Marguerite

Wednesday, 2 December 2015

Yes I am posting!

Apologies for being AWOL!

I have been busy with classes, workshops, designing and lots of boring other stuff that got in the way. I have however, and still continue to have massive problems with uploading photographs and a blog without pictures is just way too boring.

I have also been madly using up my stash of last seasons papers to prepare for a market stall this coming Saturday...lots of one off cards and off the page projects at bargain basement prices.  Why so cheap? Because I have limited storage space to keep products made with retiring or retired papers and.....
I AM PREPARING for the release of the NEW Seasonal Expressions 1 on January 1st, 2016.  I got to order and see the idea book on line for the first time yesterday and there are so many gorgeous NEW products I can hardly contain myself.  Not sure if I am allowed to do this but I have taken a couple of screen shots to give you a very sneaky peek...ssssh!

This card using one of the stamps from January SOTM - IT IS GORGEOUS!
a peek at the front cover


My ever trusty computer tech (DH) will be back next week after three long weeks away for work so I will share some of the photos I have taken then.

I nearly forgot to mention I that I am in the process of setting up a Facebook Page, On-Line Clubs and changing some pages in my blog. Look forward to being back soon.
Happy Crafting, 
Marguerite


Friday, 25 September 2015

NEW CLASSES #TWO

Just in case you missed my previous post..

Only two weeks to Go until the new classes start on October 9th

After you READ THIS make sure you scroll down to see what I am talking about...

Today I have photos of the cards I have designed using the new White Pines Christmas paper, plus, the WOTG Cards - so much fun!

NEW Card Kit for Christmas - White Pines

White Pines - Three Card Set
The beautiful White Pines Paper Pack released for Christmas 2015. I particularly like the fact that it is not very "wintery" (always a problem for us Down Under). I had lots of fun using the paper piecing technique on theses cards. Using the Stamp Set - D1656 Miracle of Christmas Holiday.


Card One
Card Two
Card Three
The cards below are from the White Pines- Workshop On The Go Kit (WOTG).
You can make FIVE of each card with this Kit.
AS A SPECIAL ONCE ONLY OFFER,
  
participants at the Uniting Gordon Class in Term 4, will be able to make
 one each of theses cards without having to buy the full kit.


Tuesday, 22 September 2015

Exciting NEW Classes

Nine Weeks of Fun starting October 9th

An opportunity not to be missed!

JUST $8.00 PER CLASS OR $65 FOR 9 WEEK TERM
Hi, my name is Marguerite Svendsen and thanks to Sue Conde and the folks at Uniting Gordon Community Centre I have been asked to hold a series of classes that I am calling "Creating with Paper". I have planned a series of different paper projects including card making, gifts, mini photo albums and more that cater to every level of crafting experience from beginner to expert.You get to choose the project YOU want to make and I'll help unlock the inner crafter in you,


You can choose to come for just one class at a cost of $8.00 per class or $65.00 for the full nine week  term.  Because this series of classes is sponsored by the Community Centre and The Ku-ring-gai Council, I'm donating my time for this series of classes and there will be no class fee.  Material costs will be kept to a minimum depending on the project YOU choose to make.    The materials cost for the first class is $2.00 and I will endeavour to keep materials costs down to a bare minimum.

Sept 25th - MORE PROJECTS ADDED BELOW

There'll never be a better, cheaper, more hassle free way to sample paper craft - with no pressure to buy - than this series of classes (or just one class if you are unsure). If you have any interest in the wonderful world that is crafting and creativity then paper craft is for you.
We all have a creative gene we just need to be shown how to tap into it. Paper Craft is the perfect introduction to all forms of creative pursuits everything from Clean and Simple card making with some stamping to more elaborate designs, Stamp a Stack  - Christmas Card Sets, easy to make Paper Gifts and Gift Boxes.

You may have tried scrapbooking in the past? Have you got a stash of old scrap booking paper and unfinished  albums taking up space?  Don't let it go to waste bring it along and let me show show you how to get more photos on a page with minimum outlay and how to make something beautiful with all those scraps. OR, make cards with your paper stash!

Below, a sneak peek at some of (but not limited to) the Christmas themed
 projects for the nine week term. 

Call Sue 0412 117 076 or 9498 6729 to book


A quick and easy to make fun gift.
you won't believe how easy this is to make

Gift Bag and "some" of the co-ordinating Cards
Christmas Gift Tag Set and Box
still easy to make - a tad more advanced

More cute box options.

Wednesday, 19 August 2015

CTMH Australasian SPECIAL Blog Hop


Hello and welcome aboard our ZOE -  Australasian Close to My Heart Blog Hop. If you have arrived here from Simone Morton's blog - Scrappy Matters then you are in the right place. If you landed here by accident, no problem, please join in by following the link at the end of this post.

As the excitement builds for the release of the CTMH 2015-2016 Annual Inspirations Catalogue and Idea Book. - None of us could resist having a special Blog Hop featuring the new Zoe Collection.

I have already posted a ZOE Six Card Set a couple of weeks ago, so I decided to try something different for today. I have made three little projects which would make fun gifts for any occasion. A little box which holds 12 Scented Tea Light Candles.  Another little "milk carton" box with removable lid and an A2 Card folder to hold the my Zoe Cards and envelopes.


Zoe A2 Card, Folder, Twelve Tea-Light Candle Box and "Milk Carton' Box

Now for some close ups...First the Card Folder. I decided to user a heavier weight White Card to make the box and decorated the front and inside pocket with the Zoe, Glacier Herringbone patterned paper. The folder is tied closed with Glacier Extra Thick Twine. The original design for the folder was Jill, from Jills Card Creations. Here is the link to the free tutorial.


Inside The A2 Folder
I decorated the inside of the card folder with the Zoe Glacier Houndstooth Paper and Silver Foil Tape

Zoe Tea Light Candle Box - Holds 12 Tea Lights

The box measures 4.5" x 3" and is 1.5' deep and is so easy to make. Because I used scented Tea Light candles (bought in bulk at The Reject Shop), I did not cover the opening with acetate.  If you prefer, secure a rectangular piece of acetate, a tad larger then the opening, with a glue dot in each corner...works a treat.  I used a CTMH Glacier Card Stock, for the box base and lid, plus a piece of Zoe B&T paper to decorate. the lid.  I also inked all the edges of the finished box with Glacier Ink. For the flower I used CTMH Canary cardstock inked with Canary and Sorbet in the centre. The original box was designed by Sam Donald from Pootles.Co.UK Pootles Papercraft, a very talented lady indeed.  I could never work out the necessary measurements as I am severely Mathematically Challenged!. Sam also designed the Milk Carton Box.

A view inside the Tea-light Box & the  "Milk Carton" with lid removed

Close up of the Zoe "Milk Carton" Box with removable lid

The box base is almost 2.5' square and high. I used the co-ordinating Sorbet Card Stock and the Zoe Sorbet and white spot paper. The finished height of the box with lid on is 4.5".  Quite roomy for a petite box.  This  box is also designed by Sam Donald from Pootles UK.  It is a a little bit more complicated to make but well worth it I think. I found both boxes by Sam on her YouTube Channel, Pootles Papercraft.

I would love you to leave a comment before heading off to the next stop Denise Tarlington's Blog, Scrap Stamp Share 


Tuesday, 18 August 2015

Tips on Tuesday

As from today I will be away on holdiday at the beach for a few weeks.  I am taking my ipad so I am not completely cut off but my posts will be limited. Whilst away I intend to spend as much time as possible away from work related activities.  Also no card making and no scrapbooking.  There is no way I could decide what to take without having to pay excess baggage charges LOL.

I have scheduled a couple of posts and if I manage to take any interesting photos, I may share a couple of those.

A really quick, easy and fun tip for today. I don't know about you, but I still struggle to tie a bow to use on a card.  This has helped me enormously.


 I found this on Pinterest ages and ages ago the link takes you to a website but it is not for the original post.  The illustration is really all you need.

until next time...
Marguerite


Sunday, 9 August 2015

NEW ZOE CARD KIT

Close To My Heart -NEW Zoe Collection

But first .....CHANGES to Kit Pricing - for Online Sales ONLY

I promised a couple of days ago that I would post pricing of my Zoe Six Card Set (see below).  I am still reeling with SHOCK! as I have found out the outrageous costs of mailing the kit to you via Australia Post. 

I have been EXTREMELY lucky with the card kits I sold previously from my blog as they were posted as large letters and they were all delivered safely.  I have since found out from my friendly local Post Mistress that besides fitting into the prescribed envelope size/sizes and thickness the envelope CONTENTS MUST BE BENDABLE..Every kit I sent out was strengthened by cardboard and was definitely not bendable.  I therefore can not afford to take the risk any longer.

To add further insult to injury, would you believe it only costs $9.50 ( that's Australian dollars) for orders under $150.00 ordered directly from my website! Here's the link to CTMH shipping charges.  By my very rough calculations that is at least $2.00 less than the smallest parcel via Australia Post and that does not include the cost of packaging.

Therefore effective immediately, and because of the prohibitive costs, I will no longer be able to mail kits within Australia.  I intend to offer FREE instructions for any of my advertised kits when you purchase the supplies needed direct from my website.

I sincerely apologise,  but unfortunately my NEW Zoe Kit will only be available at Home Gatherings and  My Classes as the kit contains some embellishments, four pre-stamped sentiments from different stamp sets, various embellishments and die-cuts,

ZOE - Six Card - Card Set

Class Options for ZOE Cards ONLY

OPTION 1
Zoe Card Buffet- Make one or two cards $4.00 each (you choose which card/cards and how many)

All Pre Cut
All Die Cuts
All Embellishments
White Daisy Card Bases and Envelopes
Use of my Stamps & Inks
(you will need to bring basic tool and supplies such as adhesives, scissors etc)

OPTION2
Zoe Kit Six Card Kit $24.00

All Pre Cut
All Die Cuts
All Embellishments
Six White Daisy Card Bases and Envelopes
Use of my Stamps & Inks
(you will need to bring basic tool and supplies such as adhesives, scissors etc)

OPTION 3
Make a $20.00 purchase from my online website and I will email full colour cutting and construction guides to you free of charge.  I realise in this particular case that you will not have the necessary die-cuts to make exact replicas of each card.  In future I intend to design a card kits which make  this option more viable.

PLEASE CONTACT ME VIA EMAIL (see right hand side panel) if you have any queries.


Friday, 7 August 2015

NEW Close To My Heart Idea Book

.... NOT QUITE YET!

The 2015-2016 CTMH Annual Inspirations Idea Book and Catalogue will be released on September1st, 2015. However there are still many of your favourites still available in store "While stocks lastand until August 31st. You might also like to check out "Retiring Items" just in case there is something you have on your wish list.  These products will not be available after August 31st.

The good news and to "bridge the gap" until then September 1st...CTMH have released the beautiful Zoe Collection available immediately for purchase in my store.  Products include The Zoe B and T Duos Pack, Zoe Complements and Zoe Assortment.


The Zoe Papers included in the pack for $15.00

PRODUCT DESCRIPTION

6 – 12" × 12" B&T Duos™ Papers (2 each of 3 double-sided designs)
6 – 12" × 12" Cardstock Sheets (2 Glacier, 2 White Daisy, 1 Slate, 1 Sorbet)

THE ZOE COLOUR PALETTE
Canary, Glacier, Slate, Sorbet, Sweet Leaf, Whisper, White Daisy

I have designed six new cards using the pack and I will be post more information on Zoe classes and kits in the next couple of days


Zoe - Six Card Kit

And for a closer look ......


Just for You - Card One


Happy Birthday - Card Two


For You - Card Three

Smile - Card Four

One Happy Day - Card Five


Christmas Tree - Card Six


That's all for now.  As promised details on classes and kit prices soon.  I have to prepare for the CTMH Product Premiere "Do" that is being held tonight for all NSW Consultants.  I am looking forward to finding out more about the exciting year ahead. Sssssssh...word on the street.... there are lots of exciting promotions planned.

Don't want to miss out on all the latest? Why not follow me via email (see the link in the right hand panel). You will receive an email every time I post some news.  Your email details are not recorded and you can unsubscribe when ever you like. This will save you scrolling through several posts each time you want to check out my blog. And, you will never miss the SPECIAL OFFERS!

Happy crafting,
Marguerite


Tuesday, 4 August 2015

Minions - Tips on Tuesday

Minion Crazy Kids?

How many of you know kids that are just going nuts for minions?  Or obsessed with minions? My daughter's friend recently had a beautiful baby girl and her big sister - three years old is convinced she is a "little Minion" because (in her words)..she has yellow patches all over her face!(this was four days after she was born).

I have to admit I find them very cute and cheerful myself.  When I saw the photo above on Pinterest, I was therefore intrigued. It is from a fun website called DIY Inspired.

The actual post is DIY Minion Party Ideas - check it out...there are some really cute ideas and they all look really easy to make. It would be pretty easy to make a gift card as well.  Happy little vegemites all around I say.

Monday, 3 August 2015

CTMH NEW IDEA BOOK

August is going to be a REALLY BIG month!

The new Annual Inspirations 2015–2016 idea book will go live to customers on September 1st, There have been some interesting and exciting changes and I can hardly wait t o start sharing the excitement.

However, to help bridge the end of the current idea books and the beginning of the new ones, CTMH has chosen to release a selection of new products to customers on 1 August, 2015 These products include the new Cricut® Artistry cartridge (Z3167), and the My Reflections™ Zoe paper packet (X7197B), the Zoe Complements (X7197C), Zoe Assortment (Z3082), and the Workshops on the Go® Zoe Scrapbooking Kit (G1096). All available from August first in my online store.

All other products in the new Annual Inspirations idea book will be made available for customer preview and purchase on September 1st, however, consultants are able to share sneak peek images with their customers via social media. I am madly getting together a new FaceBook Page so I can let you have a peek.


To make sure you don't miss out on any of the excitement, why not follow me by email?  See the follow by email link in the right hand column.  To prevent spammers,it is necessary for you to sign in this way. Remember, if you no longer wish to receive emails you can opt out with the press of a button and no questions asked. You will be sent an email just like the example below:

Activate your Email Subscription to: Designs by Marguerite
Inbox

Hello there,
You recently requested an email subscription to  Designs by Marguerite. We can't wait to send the updates you want via email, so please click the following link to activate your subscription immediately:
https://feedburner.google.com/fb/a/mailconfirm....there will be a link here
(If the link above does not appear clickable or does not open a browser window when you click it, copy it and paste it into your web browser's Location bar.)
As soon as your subscription is active, FeedBurner will send a daily email message if  Designs by Marguerite has new content.
If you did not request this subscription, or no longer wish to activate it, take no action. Simply delete this message and that will be the end of it.
Cheers,
Designs by Marguerite

Saturday, 1 August 2015

August 2015 SOTM Blog Hop

Framed – August 2015 Stamp of the Month


Hello and welcome aboard our Stamp of the Month Australasian Close to My Heart Blog Hop. If you have arrived here from Anne Patterson's blog: mummyyoumadethis then you are in the right place. If you landed here by accident, no problem, please join in by following the link at the end of this post.

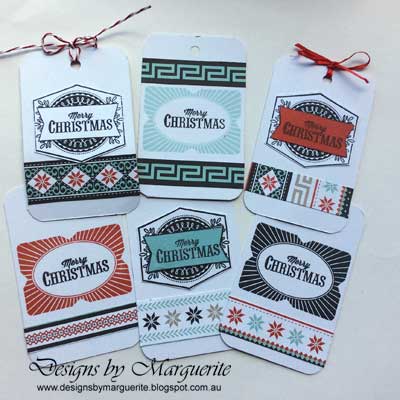
Today I would like to share with you some Christmas Gift Tags and a Boxed Gift Card Set I have made featuring Framed - the August 2015 SOTM set available exclusively throughout August for $27 or for just $5 
when you spend $75.

I thought two of the three frames were particularly suitable for using for a little set of Christmas Gift Tags using leftover scraps from the Snowhaven Paper Pack. The tags measure 2.5" x 4" and I usd a corner rounder on all edges. I used Glacier, Cranberry and Black Inks.  I am waiting on my order of CTMH red and white bakers twine to finish them off properly. (The twine I had is too hard) These tags are so quick and easy to make, I am going to make up a few more sets to give away as mini gifts.


"Framed" "Snowhaven" Christmas Gift Card Set

As I have been making a lot of boxes lately in preparation for Christmas Gift Giving classes I decided to also make a Boxed set of 3.5" square gift cards and envelopes. I made my own envelopes using 125gsm Quill Cover Paper.  I used Pixie, Honey, Lagoon and Pear card stock and coordinating inks teamed with White Daisy and Black card stock. Four white Card Bases and four black card bases with a white insert. I stamped with black ink on the coloured card stock and then swapped it around and stamped the frames with their co-ordinating inks on White Daisy card stock. Quite the little production line but really fast.The sentiments are mounted with 3D foam tape.  Because I want this to be a useful gift, I have added extra Happy Birthday and Thanks sentiment strips (along with instructions) so they can be swapped out for the less common gift types.
 For the box I made a white card stock base and a lagoon lid decorated with a white mat topped with a black glitter paper mat topped off with a card front and gorgeous Lagoon Glitter Tape.


The Box Lid
"Framed" Gift Box with Eight Cards and Envelopes


Framed SOTM is only available until August 31st 2015 from your CTMH consultant.
I'd love you to leave a comment before heading off to the next stop..Doris Taylor at Creative Inspirations 

Wednesday, 29 July 2015

Masking Technique

A quick tip for masking your stamps.

I  am sure you have all seen lots of tutorials on Pinterest and YouTube, showing various masking techniques.  But, did you know that lurking in your Close To My Heart Tool are two items you can use to make the masking technique even more successful.  The CTMH Bonding Memories Glue and Bonding Memories Broad Tipped Glue Pen can be used as Removable Adhesive. As you may or may not know, when the glue is applied it is wet and has a pale blue colour which dries clear to become a permanent adhesive.

However, if you apply the glue and set it aside to dry (making sure it does not touch another surface) it becomes the perfect removable adhesive for all your masking needs.  No need to buy expensive removable or re-positionable glue.

I am in the process of making up some Christmas Cards and decide to photograph the masking process. The Bonding Memories Glue worked perfectly. As I always like to do a stamping session first when I am working on a set of cards, I proceeded with more stamping whilst I waited for my mask to dry. That is the secret the mask should feel just tacky.

I stamped the main image twice (on my card base and on scrap paper)
I cut out the second image being most careful around the pointy bits where the other stamp would overlap. Applied the Bonding Memories Glue.  As I always like to do a stamping session first when I am working on a set of cards, I proceeded with more stamping whilst I waited for my mask to dry. That is the secret the mask should feel just tacky.

The second image stamped in black over the mask.

I was so excited that the masking technique worked I did not pay attention to my stamping and accidentally rocked my block (bit blurry in the photograph). I fully intended to re-stamp and re photograph then I had we had big technical & computer problems - that was one week ago. In the mean time I had to return the borrowed stamp set to my friend. My apologies, I did not get to re-stamp.

After the mask was removed  (again excuse the blurring)
I was at no stage concerned that my original impression was not particularly crisp in the middle because I knew I would be covering it.

Final (blurry result). the third image stamped in black was cut out and mounted on top.


As I am a big believer in the pictures telling the story, I have included the link to a YouTube video by the very talented Melanie Brown from Courtney Lane Designs.  I actually used the same stamp set as Melanie during my week without internet and computer and it worked beautifully.